Managing Multiple Github Accounts
Let’s look at how to manage multiple Github accounts from one computer. In essence, it’s simply a matter of balancing both your git and ssh configurations - which actually is not as bad as it might seem.
Everything you need to know about ...
Guess you already familiar with github and AWS Cloud Platform*If you already have your repository configured, you can go to Part 2 !
Here, you want to put your code into a repository that will be used to track the changes and trigger the deployment.
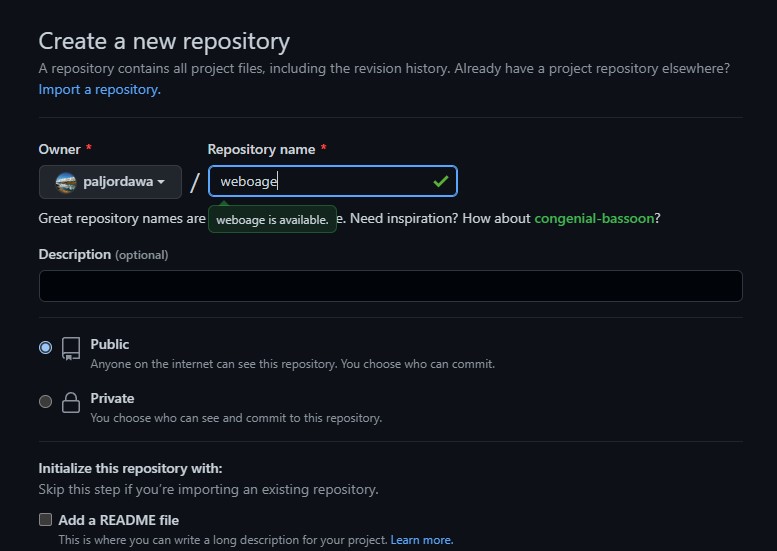
Feel free to fill the parameters to have the repository you want
git clone https://github.com/YOUR-USERNAME/YOUR-REPOSITORY
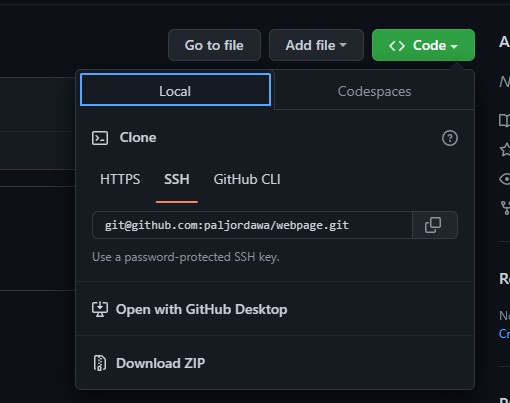 You will find the url to use in your repository, clicking on the “Code” button
For more information on the git clone have a look a the GitHub documentation.
Now, if you go to https://github.com/
Fine, let’s have a bit of AWS now!
Your goal is to push some files to your S3 bucket. For this purpose, you will need to have rights on the S3 bucket.
You will use an IAM user with an S3 policy.
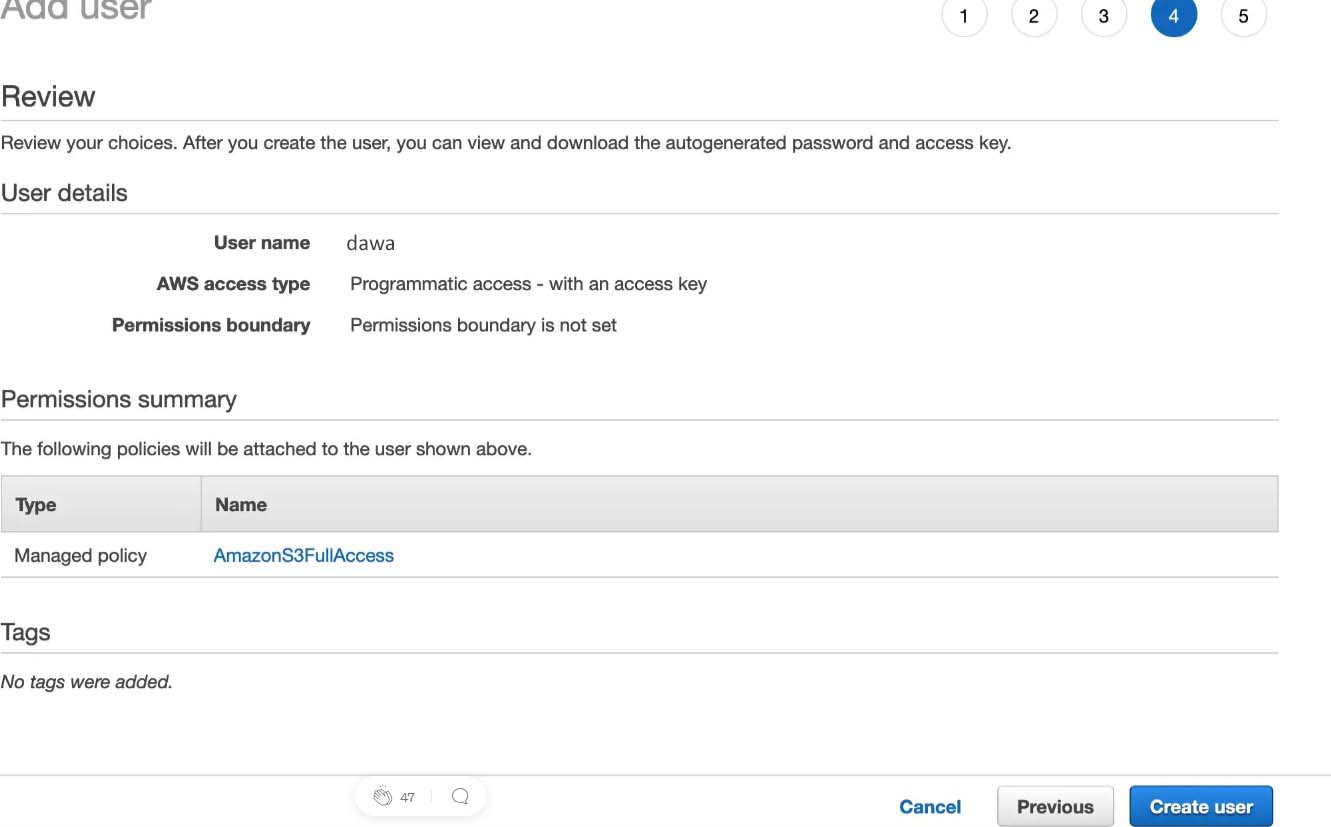
Click on “Users” in the menu and add a new user
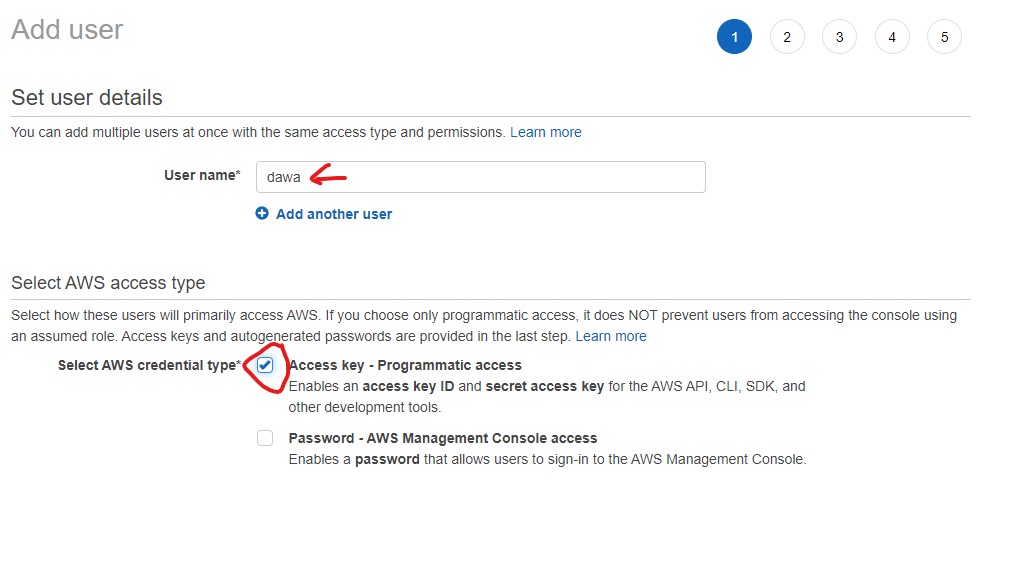
Pick a name and choose the programmatic access
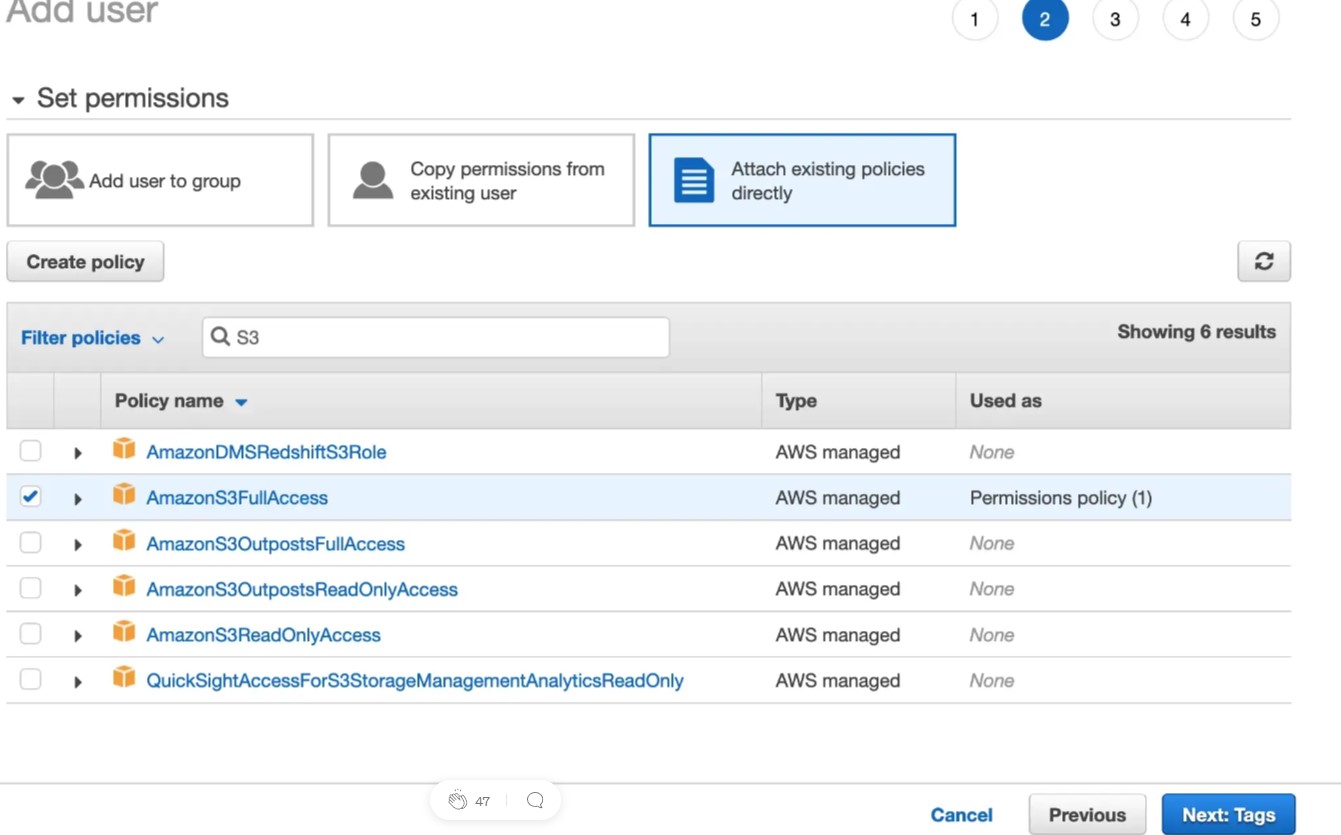
You are going to use an existing policy that will give you full control over the S3 service. (We use this for demonstration simplicity. You can enforce more security by creating your own policy to respect the least privilege principle.)
And that’s it for the AWS IAM part! Easy stuff right?
Let’s go back to GitHub!
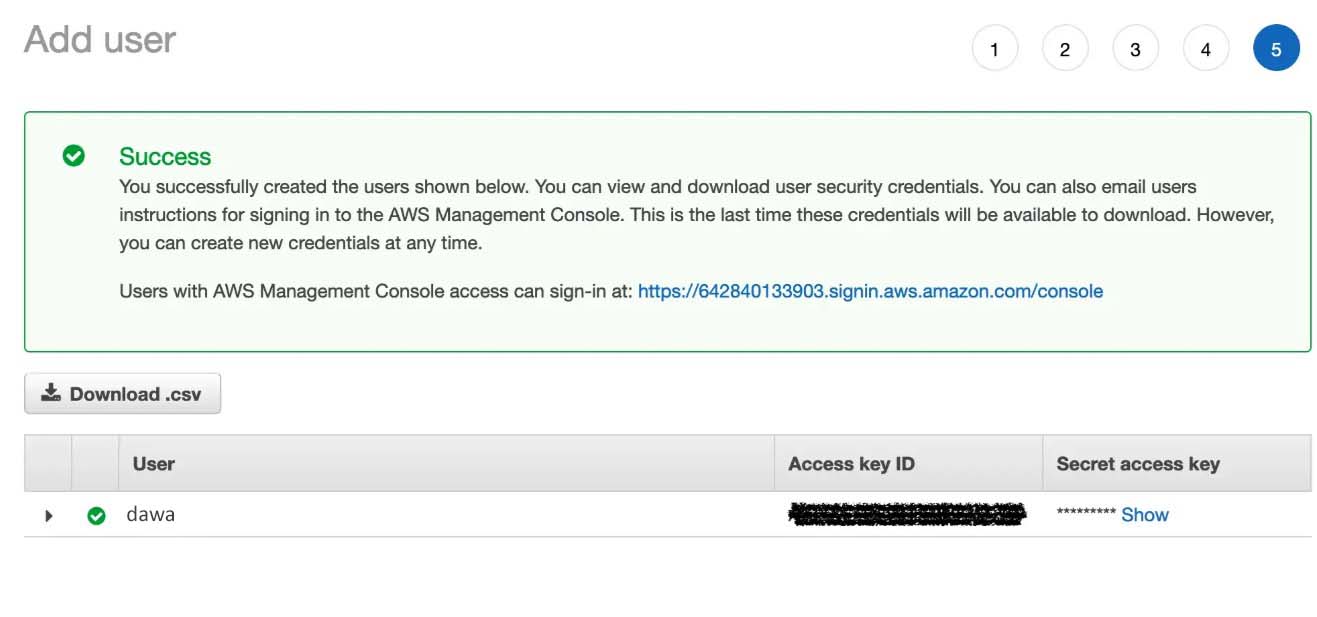
You will use a GitHub Action to deploy your files into the S3 bucket. To make GitHub able to use our AWS user rights, you need to configure the user credentials you just created.
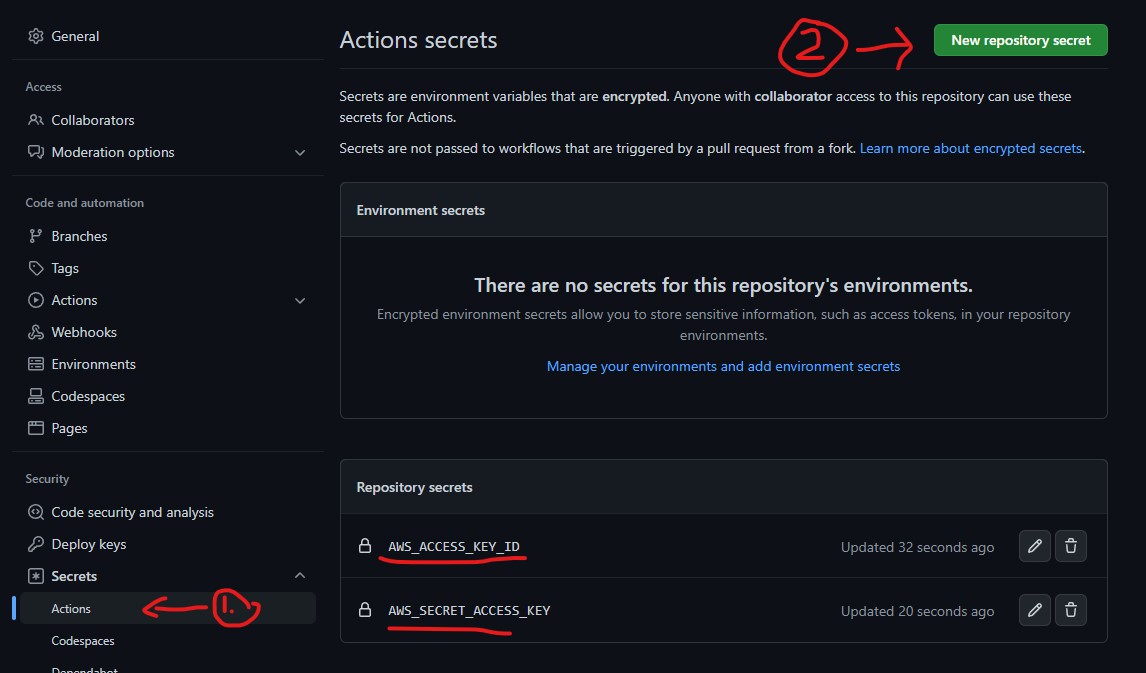
Go to the Setting section of your repository menu and click on Secrets

Create two new secrets and put the values you kept from the IAM User creation.
AWS_ACCESS_KEY_ID
AWS_SECRET_ACCESS_KEY
 Now that you have our credentials ready, let’s create the workflow itself.
All the steps in your workflow should be created in the .github/workflow/ folder. GitHub Action will monitor this folder to find what to execute.
mkdir .github/workflow
touch .github/workflow/main.yml
And add the following code to your main.yml file:
name: CI
on:
  push:
    branches:
      - main #here we choose to deploy only when a push is detected on the main branch
jobs:
  build:
    runs-on: ubuntu-latest
    steps:
    - uses: actions/checkout@v1
    - name: Configure AWS Credentials
      uses: aws-actions/configure-aws-credentials@v1
      with:
        aws-access-key-id: $
        aws-secret-access-key: $
        aws-region: us-east-1 # Use your bucket region here

    # Here you could add some building steps if you were dealing with some angular/react/Vue...
    # - name: Build static site
    #  run: yarn install && npm run-script build

    - name: Deploy static site to S3 bucket
      run: aws s3 sync ./thefoldertodeploy/ s3://<<your-s3-bucket-name>> --delete
      # --delete flag will remove any file in the s3 that are not on the "<<your-s3-bucket-name>>" folder
Here you are creating an Action to execute some steps every time a push happens on the main branch. You run your Action on an ubuntu (Linux) machine and you have a dependency on one of the already created AWS GitHub Actions.
It configures your credentials as well as the region. It should correspond to the one in which you created your S3 bucket.
Then you can see the Action steps.
As you are pushing a simple HTML/CSS folder, you have no build step but you could add some steps here. Maybe generate some build artifacts into a folder and push this folder to the S3 bucket.
You use the AWS s3 sync command to synchronize the folder “thefoldertodeploy” with the content of the S3 bucket.
Now you can push this to the main branch.
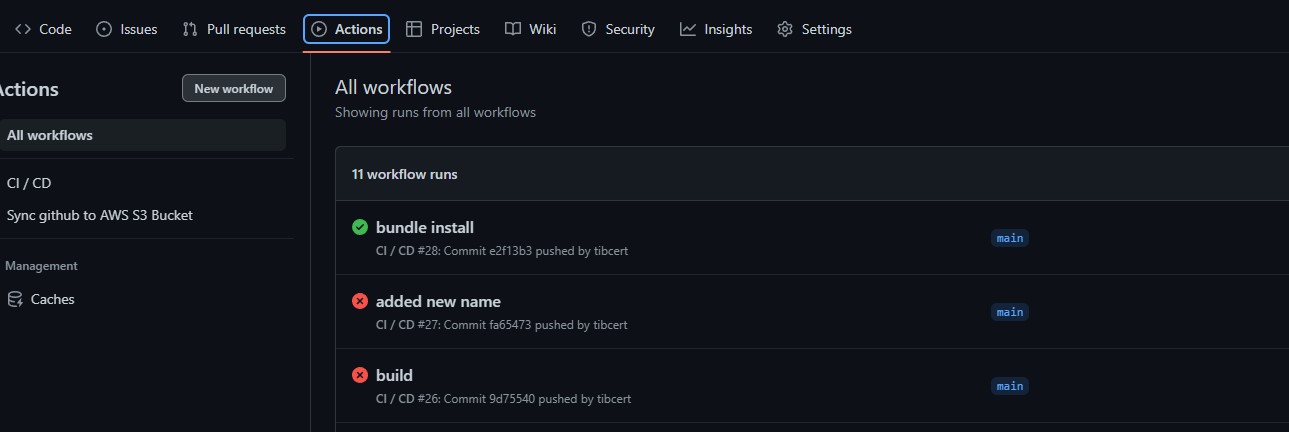
Now that your Action is configured, change a little thing visible on your website and push this change to the main branch.
Then go to the Actions section of your GitHub repository and observe the steps being executed!
/If you want to know more about GitHub Actions, here is a link to spend some time on it!
Congrats! You have just found a way to focus on what really matters: the content!
GitHub Actions is a really good way to implement a simple pipeline for your static website. You can get ready to push modification within minutes and you will never be responsible for your deployments anymore.
From there, you can do a little exploration session on GitHub actions or just add this topic to your Wish list!